After putting off any changes to my workflow due to the amount of work lately, I recently took the plunge into using the Sass preprocessor / Compass to help make managing stylesheets bearable again. Compass especially serves to give developers access to some lovely sugar, with commonly implemented solutions ready to integrate into your stylesheets – and will seriously reduce the amount of work dealing with different browser differences.
There are already many articles about CSS extenders / preprocessors, and without going into the debate of Less vs Sass, the main downside is having to set up the development environment to process the enhanced stylesheets before we can view the results.
Installing Compass
Arguments against Sass (and implicitly, Compass) requiring Ruby to work are easy to workaround – there are guidelines for all platforms at http://www.ruby-lang.org/en/downloads/ – for Ubuntu 10.04, I ran:
sudo apt-get install rubygems
This installs all the necessary prerequisites. The Compass installation page gives all the necessary steps to get started.
You may need to add a path to the gems for the commands to work – assuming the scripts are located at /var/lib/gems/1.8/bin/ (say in the case of ruby 1.8) add this to the end of your ~/.bashrc file:
export PATH=/var/lib/gems/1.8/bin/:$PATH
With Windows, this is even easier. The rubyinstaller also sets up the paths for you! The remaining steps of installing sass / compass via gem applies.
Setting up a compass with an existing project
If you already have existing stylesheets, you will want to turn off preset scss files generated by compass with the bare option. You can also direct compass to follow your project’s folder structure.
Run this within your project root (for example /var/www/htdocs) – note that this is just an example – and reflects my own setup:
compass install bare --sass-dir "app/pub/sass"
   --css-dir "app/pub/css" --javascripts-dir "app/pub/js"
   --images-dir "app/pub/images"
(this should all be one line)
Directories will be created if they do not already exist. A config.rb will be created in your project root that tells compass which folders to scan. See http://compass-style.org/install/ for further guidelines and a nice wizard to guide you in setting up compass.
Usage overview
The main out-of-the-box route to processing SCSS/SASS files and/or Compass projects is to run the command line app when you are ready to test new changes – in the case of compass:
compass compile yourapp/trunk/
This can be rather tedious though especially with the rapid approach to web development, and where simply refreshing the browser can suffice to see changes. To automate this process, compass and sass can watch for changes and compile automatically as required – just run this at the start of your session:
compass watch yourapp/trunk/
Again, you have to remember to start this process every session. There is a [paid-for] desktop GUI application to deal with this too, but personally, I’d rather not have to think about this!
Builders in Eclipse
I started looking into methods to automate this within Eclipse. We can break this down: the objective is to run compass after saving the SASS files.
One answer that has popped up several times on stackoverload is to write an extension to run an action on the save event – however without proper tooling in Eclipse, this would presumably be another project to consume your time in!
There is a solution however in the form of project builders.
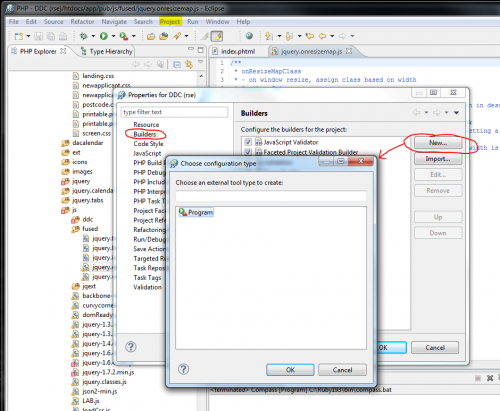
Within Eclipse project properties (Project menu item > properties), you can find the ‘Builders’ section, (this is also where you can enable or disable JavaScript parsing). The ‘New’ button allows developers to add external programs that run as part of the project build process.
In our case here, every time we save a file, we can trigger an automated rebuild of this file, and we need Project > Build Automatically to be enabled for this to happen.
Firstly though, we need to create the new builder. Just for information’s sake, I am running Eclipse Indigo SR2 with PDT v3 on Windows 7, but these apply equally for Macs and Linux platforms). These were the steps I performed:
- If not already, open the project property window (Project > Properties), and navigate to the Builders section.
- Click [New…]
- A dialog titled ‘Choose configuration type‘ will appear. Select ‘Program‘, and [OK].
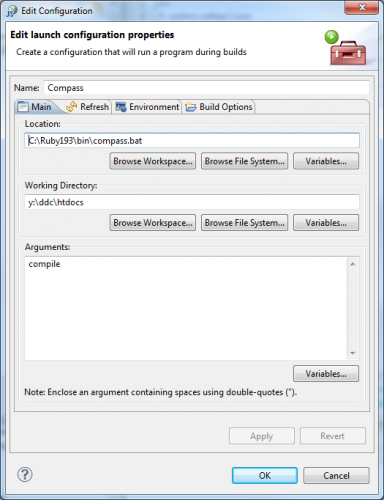
- The ‘Edit Configuration’ window will appear for the builder settings. Name the new builder something relevant – in this case I used ‘Compass’;
- The tabbed sections with notes:
- Main page configures the external program –
- Location: path to compass script. This must either be within the environment path (as set in the Environment page), or be the full path to the gem script. I’ve set this to [C:\Ruby193\bin\compass.bat] in my case. The dialog here will report if the program cannot be located.
- Working directory: the project path as specified for compass (or where you want sass to operate). Mine is [Y:\ddc\htdocs]. Even though I use RSE to remotely access these files within Eclipse, external apps like Compass requires an actual filesystem path.
- Arguments: compile
- Refresh specifies what you want to do after the program has finished compiling. I would like Eclipse to recognise the updated css files!
- ‘Refresh resources upon completion‘ is [checked]
- ‘Specific resources‘ is set to the output folder where the css files are saved to – in my case [app/pub/css] is ticked.
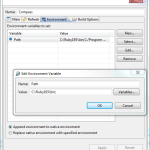
- Environment allows you to set specific variables applicable to the command line or your application
- Path – here, compass.bat would not run as Eclipse could not find ruby.exe, so the ruby/bin path had to be setup (in fact, I copied this from the Windows environment settings). Note it’s likely that this would not apply to Linux or Mac environments.
- Build Options – what triggers this builder? plus miscellaneous.
- ‘Allocate console‘ [checked] so we can see the results in the console panel
- Run the builder: [After a clean], [During manual builds], and [During auto builds].
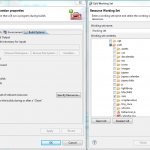
- ‘Specify working set of relevant resources‘ [checked] – set this to the sass source folders – in my case, [app/pub/sass]. Any changes found in this folder will trigger this builder.
- When all done, [OK] the configuration. The new builder should appear as the last item of the list.
- Make sure that Project > Build Automatically has been ticked in the menu to enable automatic compiling.

The easiest way to test the new builder is to open the console panel, and create/edit a SCSS (or SASS if you prefer) file, and save within the sass folder. If everything is working, ‘building workspace’ should appear in the status bar, and the console should display the program path, and the results.
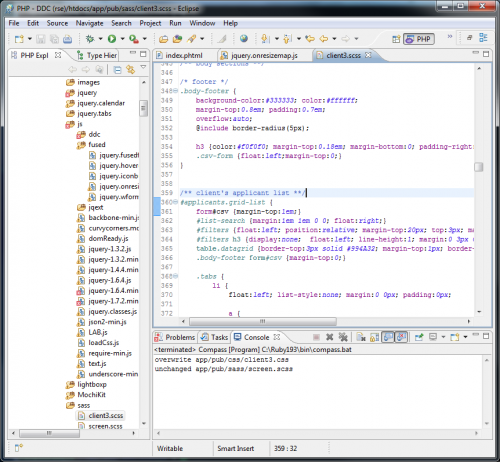
The icing on the cake – you only have to perform this once for each project instance!
Conclusion
An automated build process using external tools – applicable with other preprocessors – i.e. javascript minifiers. A streamlined workflow. One less thing to think about.
